
How to Apply Gel Polish Perfectly: A Step-by-Step Guide in 2026
Whether you’re new to nail care or want long-lasting nails, a gel manicure is the perfect choice. Compared to regular polish, gel lasts longer thanks to its chip-resistant formula. This guide from S&L Beauty will walk you through step-by-step gel application, plus tips for nail care and ways to customize your nails.
Here’s what you’ll learn:
- What you need to apply gel nail polish at home
- How to apply gel nail polish: Step by step
- Gel nail polish after care
- How to apply gel polish on acrylic nails
- How to apply nail tips with gel overlay
- How to apply nail decals over gel polish
- What causes gel polish to peel off after a few days?
What you need to apply gel nail polish at home

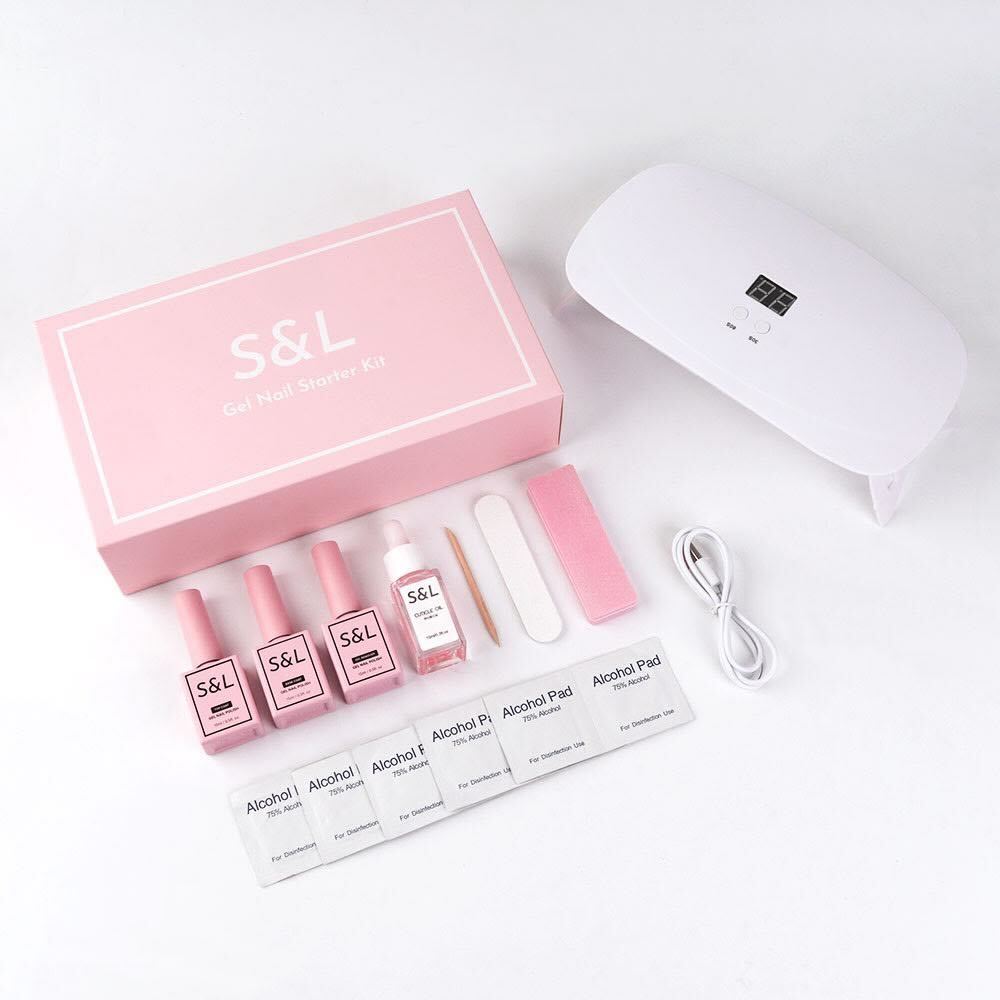
Applying gel nail polish requires several supplies, so explore at-home gel manicure kits that has all the supplies to both apply and remove gel polish.
Most gel nail kits only have the supplies to help you apply gel nails, but not remove them, so look out for gel nail kits that can do both.
UV/LED lamp

S&L UV LED Gel Nail Curing Lamp
A UV/LED curing lamp is critical for gel nails because it's used to harden the gel polish layers, making the gel nails more durable and chip-resistant.
“Curing” is a term that refers to the process of drying gel nails under a UV/LED lamp. The chemical reaction activated by the light source quickly dries your nails so they don’t chip or smudge immediately after application. This is how gel manicures last longer than most other nail manicures types.
Cuticle oil

Cuticle pusher

A cuticle pusher is used to expose as much of your nail bed as possible, so that it takes longer for your nails to visibly grow out under your polish.
Nail buff

A nail buffer is another nail-kit staple. It lightly prepares your nail's surface by gently filing and buffing away imperfections, making it smooth and even for easy application of gel polish.
Nail file

A nail file shapes your nails and removes gel polish by smoothing the edges and grinding down the surface. This helps in maintaining the desired nail shape and prepares the nails for new polish.
For removing gel nails, you can use a medium grit file. If you are applying soak off gel polish, use a 180 grit nail file to remove a hardened top coat before removing the soak off gel polish.
Tip: you want to avoid damaging the natural nail underneath by using too coarse a nail file.
Nail clippers

Source: Pexels
Nail clippers are used before a gel manicure to shape the nail. After gel polish is applied, don’t clip your nails. Cutting your nails after a gel manicure can very likely ruin them as it will break the seal at the tip, causing the gel polish to peel off.
UV gel manicure gloves

Wearing a UV gel manicure glove protects your skin from the UV light used to cure the gel polish on your nail. This is important because long-term exposure to UV light can damage your skin. The UV gloves shield your skin from unnecessary exposure to UV rays.
Acetone

You use acetone to clean your nails before an application and to remove gel polish. Any acetone content of 60 percent or more will work.
The acetone strips away oils and residues for a clean surface before gel polish is applied and breaks down gel polish during the removal process for an easy removal. Any acetone content of 60 percent or more will work.
To apply it, you’ll need cotton balls or lint-free nail wipes that won’t leave any fuzz on your nails.
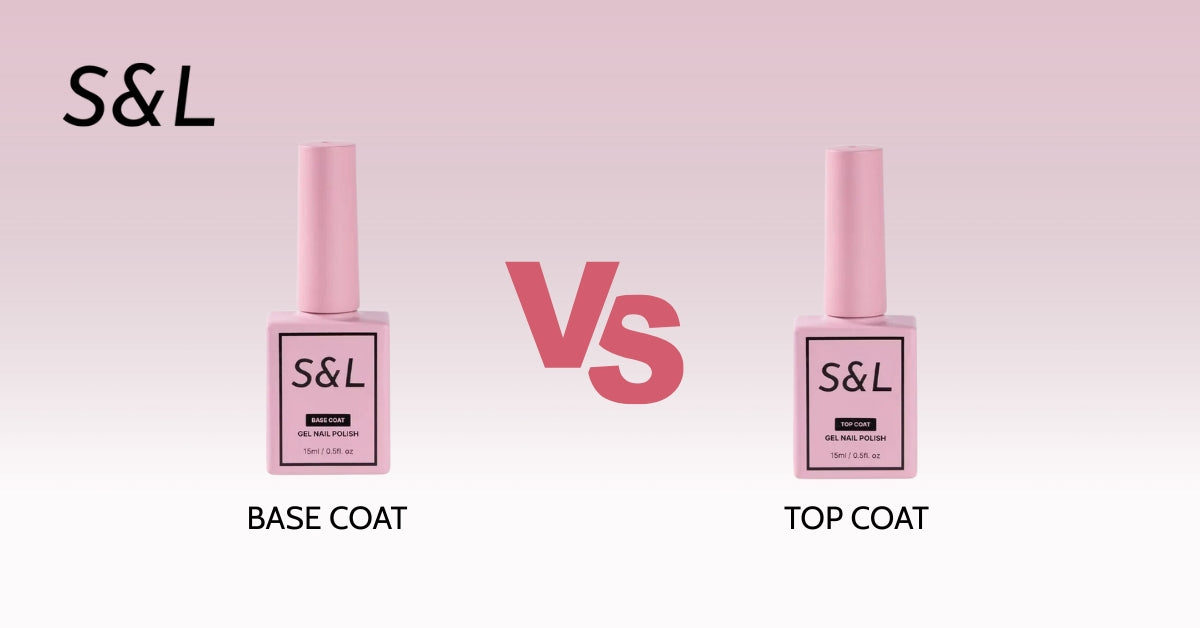
Gel top coat

A gel top coat is essential for applying gel polish because it seals in the color and provides a glossy finish that protects the nails from chipping and peeling.
If you don’t have a gel top coat, you can try S&L’s newly updated at-home gel nail kit, which includes all the essential tools — including a gel top coat — to help you apply gel polish correctly.
Gel base coat

A gel base coat is crucial because it helps the gel polish bind to the natural nail, creating a smooth surface that makes the gel nails more durable. This is why gel nails last much longer than regular nail polish.
Gel polish

Finally, the fun part. Pick your favorite gel colors or experiment with something new!
How to apply gel nail polish: Step by step

Applying gel nail polish is as much of a ritual as it is an art. We’ll take you through how to apply gel nail polish step-by-step to ensure that your at-home gel manicure or pedicure is absolutely foolproof. Here’s our complete, step-by-step guide on how to apply gel polish:
1) Cut and file nails

Source: Pexels
The first step to a beautiful gel mani is shaping your nails. Use a nail clipper to trim them to the size and shape you want, then use a nail file to round out the edges for smooth application.
2) Push your cuticles down

Source: Pexels
Use a cuticle pusher to push back your cuticles to create a cleaner and more visible nail surface area. Use it to also remove dead skin from your nail plate and to help maintain even cuticles.
We advise not trimming your cuticles as others do since doing so would open up the root of your nails to infections.
3) Buff your nails
Source: Pexels
Lightly buff your nails to make the surface of your natural nail smooth and shiny for application and primed to bond with the gel polish.
Avoid overbuffing as this will lead to more thinner, weaker nails.
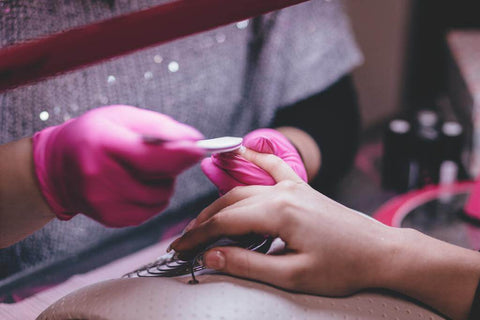
4) Clean nails

Source: Pexels
Clean your nails thoroughly with rubbing alcohol to allow the polish to adhere directly to your natural nail. Any impurities, such as remaining cuticle oil or dust particles, can cause the polish to lift prematurely.
5) Apply gel base coat

Now for your first layer, apply the gel base coat. This will ensure that the gel polish adheres properly and lasts as long as possible.
Apply a thin coat over each natural nail. Make sure to seal the open edges with the base coat, or cap the free edge, as this process is called. Capping the free edge means to paint over the edge of your nail so that this protective layer gives your nail a chip-resistant finish.
After your each nail on your hand has been coated with a gel base coat, cure your nails under a UV lamp or LED light for at least 45 seconds to a minute before continuing to ensure that it has thoroughly cured.
It's normal for the nail to remain sticky after curing the gel base coat. Avoid touching the nail during this stage as this will spoil the application process!
6) Apply gel polish

Next, apply your gel polish color.
Apply each layer in a thin coat all the way to the edges of the nail, being mindful not to stray onto the skin. You want to apply the gel polish as close to the cuticle as possible. If you make a mistake, simply wipe away the stray polish before curing, so it does not dry and become harder to remove.
We recommend applying at least two coats of color. The more coats you apply, however, the more opaque your application. Don’t worry if the first one looks streaky -- thin layers will do the job better than thick uneven ones.
Cure the gel polish under your UV/LED lamp in between each coat for at least 45 to 60 seconds each, depending on the instructions of your UV/LED lamp.
It's normal for the nail to remain sticky after curing the gel polish as well. Again, avoid touching the nail during this stage as this can ruin the application process.
7) Apply gel top coat

Source: Pexels
Once your gel polish is applied and cured, apply a gel top coat to seal your color to give it shine and a chip-resistant finish. It's important to cover the entire nail with a gel top coat, and cap the edges for a perfect seal.
After the gel top coat is applied, cure your nails under your UV/LED one last time, for at least a minute, so that they the nails are perfectly dried and sealed.
Sometimes gel will leave a tacky residue after curing, which you can simply wipe off with a cotton ball dipped in alcohol. Then you’re good to go!
Gel nails after care

Proper nail care ensures that your gel polish continues to look good for as long as possible, and keeps your skin and nails healthy.
Ideally, you want to apply cuticle oil on your nails daily while wearing gel nails. That is, every time you wash your hands, in the morning and at night. Basically, whenever you notice your skin is dry.
A good cuticle oil keeps the nails elastic and skin soft. Mediocre oils wouldn't penetrate and sit on top of the nails.
How to apply gel polish on acrylics

In combining gel polish with acrylic nails, your nail art can last as long as 6 weeks with only minor touch-ups. Familiarize yourself gel vs acrylics nails differences before proceeding.
Here are the steps we recommend you follow:
1. Remove old polish with a non-acetone nail polish remover
This is a necessary step to ensure that any leftover polish is completely removed from the nail.
You must use a non-acetone remover because acetone can degrade the acrylic.
2. Clean and dry the nail
This step ensures that there is no residue left on the nail that could interfere with your application. Your nails must be completely dry as well, because trapped moisture could lead to infection.
Also, be sure not to use any harsh chemicals, which can react with the acrylic. Your best bet would be to use baby wipes or just wash your hands extra thoroughly.
3. Apply an acrylic-friendly base coat, colored polish, and top coat
You can apply gel polish to acrylic nails the same way that you would to your natural nail, using the steps outlined above.
An acrylic-compatible base coat is necessary to ensure that you do not accidentally stain your acrylics.
How to apply nail tips with gel overlay

Gel polish can also be applied to store-bought nail tips that can be glued on over your existing nail. The process is similar to regular gel polish application with a few notable differences.
- First, push back your cuticles, buff the surface of your nails, and wipe them clean.
- Then, brush a thin coat of nail glue over each nail. Then, apply nail tips over the whole nail of each nail, rocking them back and forth to expel any trapped air bubbles.
- Adjust the size and shape of the nail tip as needed.
- Buff and clean the surface, then apply your gel polish as usual. Start with a base coat, then add at least two layers of color, curing each coat as it is applied.
- Before applying the top coat, wipe off the tacky surface, buff the top layer of color, and clean it. Then apply and cure your top coat, ensuring a lasting seal.
How to apply nail decals over gel polish

Source: Pixabay
Once you master basic gel polish application, you can also try your hand at nail art. Nail art designs go hand in hand with gel polish, because the long-lasting formula means that your art will last longer as well.
One simple method is to use a nail decal. Apply whatever color you want under the design, then cut out the portion of the sticker that you plan to use and apply it.
If you use a water decal, you can simply dip the sticker in water, separate it from the backing, and apply it to your nail.
Using a wooden stick or just your finger, smooth out the sticker, and then go over it with polish to fill in any details or add some pops of color.
Once your nail art looks how you want it to, cure the design for at least 30 seconds, and apply top coat. Cure the top coat layer and you’re ready to start showing off your design!
What causes gel polish to peel off a few days?
Here are the three biggest reasons why your gel polish may already begin to peel off a few days:
- You may have painted over your cuticles, so when your skin grows it pushes the painted gel polish down and creates an opening, allowing water to enter and lift the gel polish.
- You didn't apply the top coat over the whole nail, so the painted gel polish isn't protected and therefore prone to chipping.
- You didn't cap the nail tips when painting over your nails. So when you type or do anything with involving your nails, the gel polish starts to peel off from the nail tips.
Takeaways

Soon after you have painted your nails, you can start doing daily activities and chores, such as dishes. Just be careful of activities that have a tendency of chipping the tip of your nails, which is where chipping tends to occur most.
With this step-by-step guide, you’re ready to expertly apply gel nail polish at home by yourself.
If you’re ready to try your hand at DIY gel nails, try our gel nail kit with uv light.
20 comments
Excelente información
Patricia nunez
I am studying acert 111 nail technician course and have first clients for gel polish starting next Tuesday it was good reading this topic of yours
Miss Emma Walsh
Thanks! This helps loads and will forever change the way I did my nails!
Olivia McDonald
Do you have to have a special LED light or will a regular LED lightbulb be sufficient?
Marie Cutlip
Thank you so much. It was very important and I took some notes to add on my nail bar
Nomsa
Best explanation I ever read
Ivette
I never follow these steps while applying nail polish. thanks for explaining the steps in a simple way. It helps me a lot to me when I apply at home.
Hanifa
Thanks for a well elaborated guidelines.. it was easy to practice
Leah Thuo
Thank you for the great instructions wish me luck
Cindy
very helpful video. thank you so much!
Pamela
Can’t wait to try this, I started with the clear gel like the salon did, what a mess.
Diane Greaves
Thanks,
I appreciate the detailed step ny step proper procedure
Collette
Thanks for explaining this, I feel much more confident in doing my own nails.
Donielle
Definitely the best explanation on the web. Thank you for making me more confident in doing my nails at home.
Sabrina
Thank you.
Jane Determan
Thank you for the clarification.now I know and understand the do’s and don’ts.
Lati
Thank you for the clear tuition.
Just a question if using nail stickers or wraps is it still ok to apply a gel top coat?
Tracey
This is an outstanding comprehensive and easy to grasp explanation of all parts of the process – absolutely the best I have read online to cover all of the questions I have had as a beginner – thank you so much!
J. E. Telfer
This explanation was brilliant thanks a lot for the effort in writing it made my life a lot more easier in understanding how the process works!
Seda
after reading this, im excited to try myself!!
Celine
Leave a comment
This site is protected by hCaptcha and the hCaptcha Privacy Policy and Terms of Service apply.