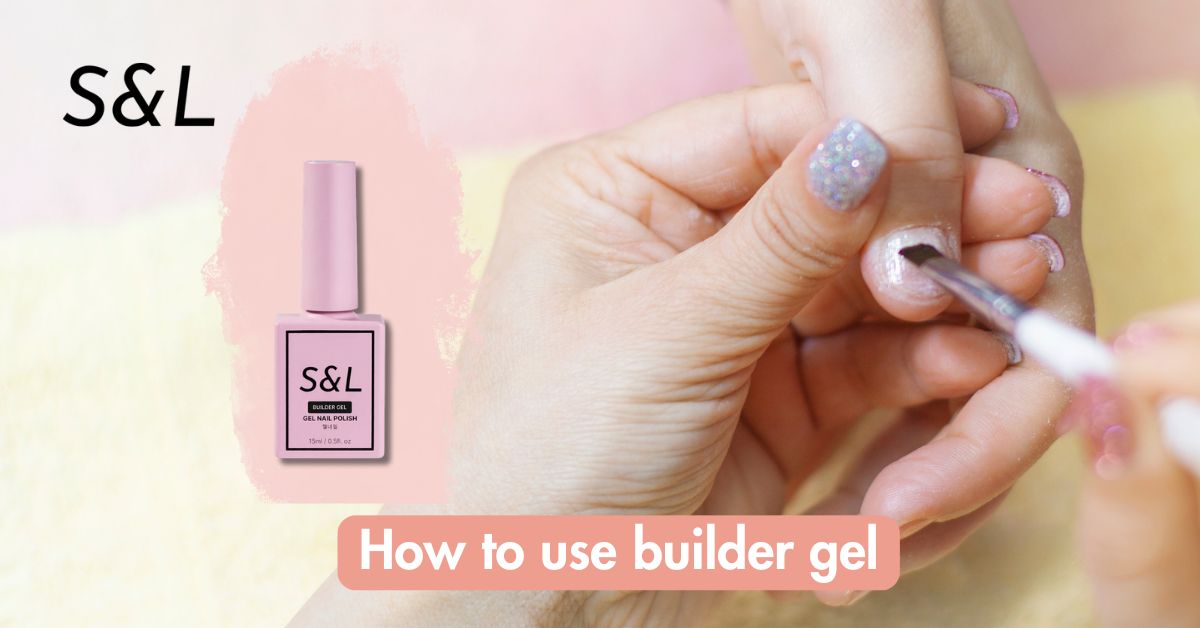
Cómo usar el gel constructor: guía paso a paso
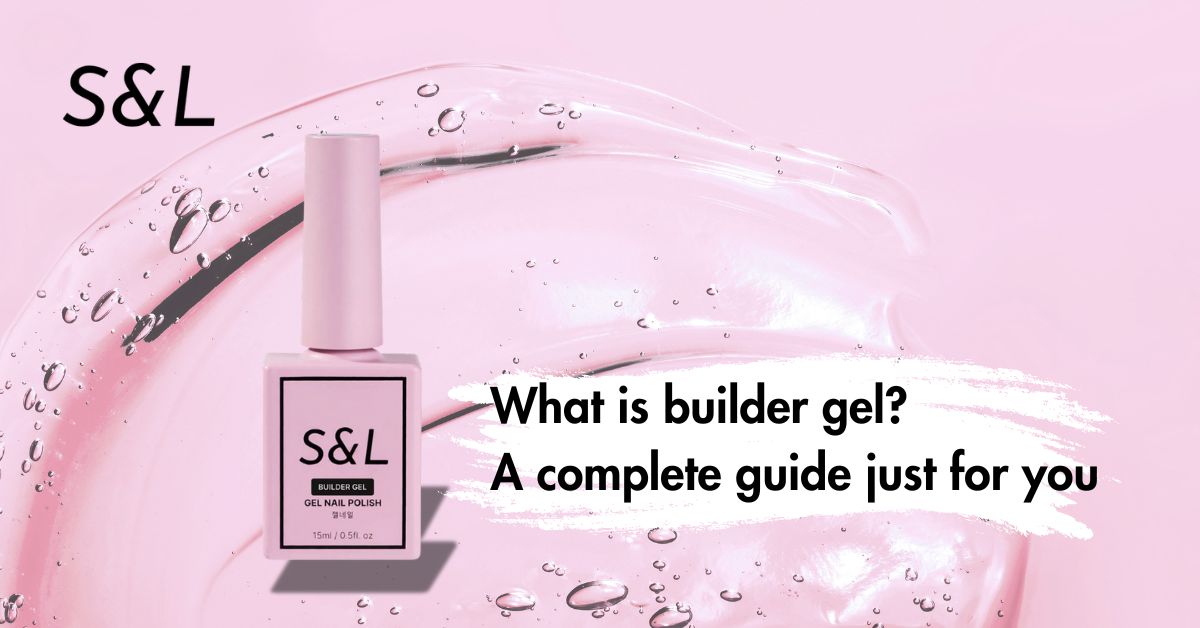
El gel constructor es la solución perfecta para el cuidado moderno de las uñas gracias a sus numerosos beneficios. Sin embargo, muchas personas aún no saben cómo aplicarlo correctamente y pueden dañar sus uñas accidentalmente. En este artículo, S&L Beauty te guiará a través de los pasos correctos para usar el gel constructor de forma segura y eficaz en diferentes situaciones.
Usos comunes del gel constructor
El gel constructor se puede usar en diversas situaciones para mejorar la fuerza, la forma y la apariencia de las uñas. A continuación, se presentan los casos más comunes en los que se recomienda su uso:
- Fortalecimiento de uñas débiles: Ideal para uñas quebradizas o blandas que se rompen con facilidad.
- Superposiciones de uñas naturales: agrega durabilidad sin agregar longitud.
- Extensiones de uñas: Se utilizan con formas o puntas para crear uñas más largas.
- Reparación de uñas rotas: Perfecto para arreglar grietas o pequeñas roturas.
- Base para decoración de uñas: Proporciona una superficie resistente para esmalte en gel, diseños o diamantes de imitación.
- Modelado y estructura: ayuda a construir el ápice perfecto y lograr formas estilo salón.

Pasos de preparación antes de aplicar el gel constructor
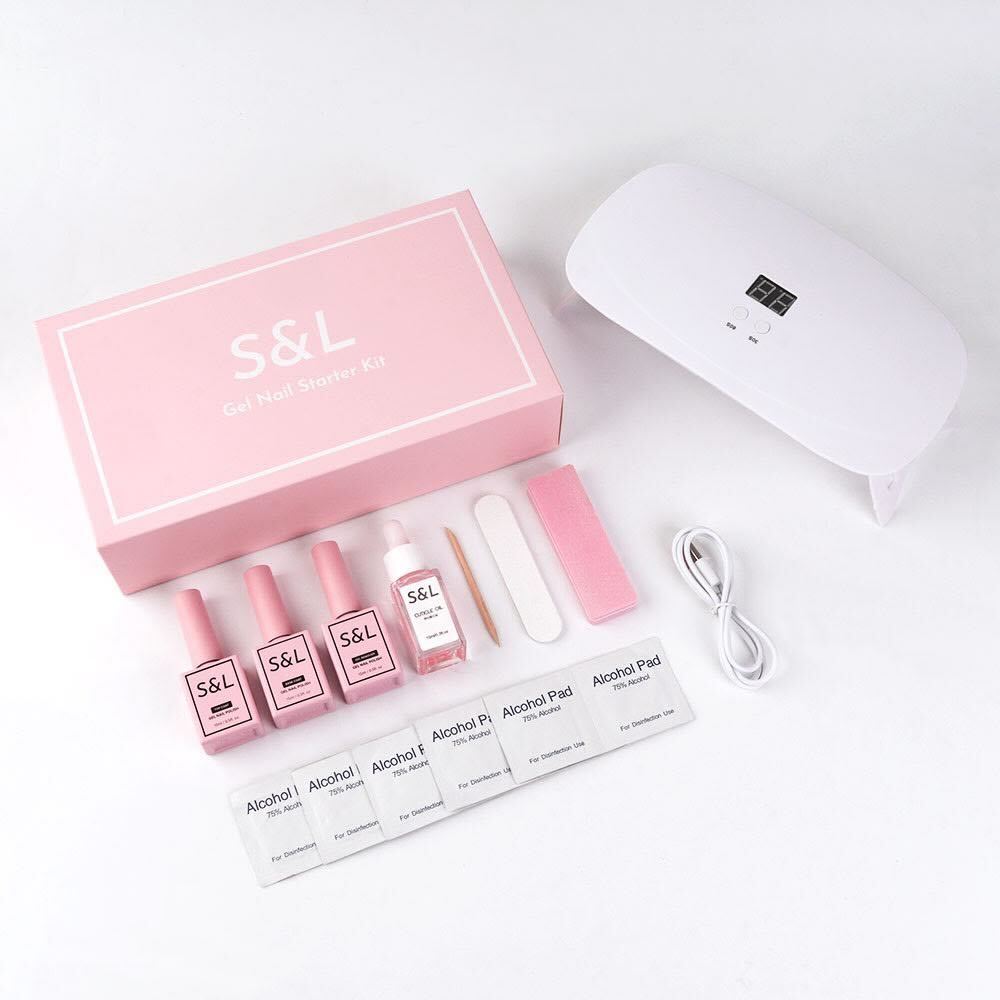
El primer paso esencial antes de usar el gel constructor en las uñas es reunir todas las herramientas necesarias. Esta preparación facilitará el proceso de manicura y evitará confusiones o retrasos durante la aplicación. Necesitará lo siguiente:
- El gel constructor de tu elección
- Una lámpara UV o LED compatible
- limas de uñas
- Pulidores de uñas (tanto finos como gruesos)
- Deshidratador de uñas
- Imprimación sin ácido
- Un pincel de gel constructor de alta calidad (elige una forma y tamaño que se adapte a tus uñas)
- Formas de uñas o puntas de uñas (si planeas hacer extensiones)
- Capa superior de gel
- Limpiador de uñas o alcohol isopropílico
- Empujador de cutículas
- Alicates para cutículas
- Suero nutritivo de aceite para cutículas
- Guantes de protección

Cómo usar gel constructor en uñas naturales
Aplicar gel constructor directamente sobre las uñas naturales es una forma fantástica de añadir resistencia y durabilidad sin alargarlas. Este método es ideal para quienes valoran el largo natural de sus uñas, pero tienen problemas de debilidad o desean prolongar la duración de su manicura.
Guía paso a paso:
- Aplicación de la prebase: Comienza aplicando una capa fina y uniforme de prebase sin ácido sobre tus uñas naturales preparadas. Evita el contacto con la piel, ya que puede causar irritación. Deja que la prebase se seque al aire por completo. Normalmente tendrá una textura ligeramente pegajosa.
- Aplica una capa deslizante: Toma una pequeña cantidad de gel constructor con tu pincel. Aplica una capa muy fina, casi transparente, sobre una uña a la vez. Esta capa deslizante facilita la extensión de las capas posteriores y facilita su adhesión a la placa ungueal. Asegúrate de distribuir el gel sobre la superficie de la uña sin saturar la cutícula ni tocar la piel circundante.
- Cura la capa deslizante: Coloca la mano bajo la lámpara UV o LED y cura la fina capa deslizante según las instrucciones del fabricante de tu gel constructor. Los tiempos de curado pueden variar, por lo que es fundamental consultar las instrucciones del producto (normalmente son entre 30 y 60 segundos para las lámparas LED y 2 minutos para las UV).
- Aplica el gel constructor: Ahora, toma una gota de gel constructor un poco más grande con el pincel. Colócala en el centro de la uña, cerca de la cutícula, pero dejando un pequeño margen para evitar que el gel toque la piel.
- Dar forma y distribuir: Manipule suavemente la gota de gel constructor con el pincel, extendiéndola con cuidado hacia el borde libre de la uña y luego hacia la cutícula. El objetivo es crear una capa suave y uniforme que cubra toda la superficie de la uña y proporcione la resistencia y estructura deseadas. Si desea añadir más resistencia, intente crear un ligero vértice en el centro de la uña aplicando un poco más de producto en esa zona.
- Cura completamente : Una vez que estés satisfecho con la aplicación en una uña, sécala completamente bajo la lámpara según el tiempo de curado recomendado para tu gel constructor (normalmente es de 60 a 120 segundos con LED y de 2 a 3 minutos con UV para una capa de este grosor). Asegúrate de que toda tu mano esté correctamente colocada bajo la lámpara para un curado uniforme.
- Retirar la capa de inhibición: Tras el curado, notará un residuo pegajoso en la superficie del gel constructor. Esta es la capa de inhibición y es completamente normal. Humedezca una toallita sin pelusa con limpiauñas o alcohol isopropílico y limpie bien cada uña para eliminar esta capa pegajosa, dejando al descubierto una superficie lisa y dura.
- Limar y dar forma (opcional): Si lo desea, ahora puede limar y dar forma suavemente a su gel constructor para refinar la apariencia de sus uñas. Use una lima de grano medio para dar forma al borde libre y un pulidor más fino para alisar cualquier imperfección en la superficie.
- Aplica el esmalte en gel y la capa superior: Si quieres añadir color, aplica tu color favorito de esmalte en gel en capas finas y uniformes sobre el gel constructor, secando cada capa bajo la lámpara. Termina con una capa de capa superior en gel para sellar todo y añadir brillo (o un acabado mate si lo prefieres). Cura la capa superior según las instrucciones.
- Limpieza final y aceite para cutículas: Limpia tus uñas una última vez con limpiador o alcohol para eliminar cualquier residuo pegajoso del top coat. Finalmente, aplica aceite para cutículas en las cutículas y la piel alrededor de las uñas para hidratarlas y nutrirlas.
Cómo usar gel constructor para extensiones de uñas
El gel constructor también es un medio fantástico para crear extensiones de uñas, permitiéndote lograr la longitud y forma deseadas, ya sea que prefieras un realce sutil o un look más dramático. Puedes crear extensiones usando puntas o moldes para uñas.
Uso de puntas de uñas para extensiones:
- Siga los pasos de preparación: comience preparando minuciosamente sus uñas naturales como se describió anteriormente.
- Selecciona las puntas de las uñas: Elige puntas del tamaño adecuado para cada dedo. La punta debe ajustarse perfectamente de lado a lado, sin ser ni demasiado ancha ni demasiado estrecha.
- Aplicar pegamento para uñas: Aplique una pequeña cantidad de pegamento para uñas en el hueco de la punta de la uña (el área curva diseñada para adherirse a la uña natural).
- Adherencia de la punta de la uña: Coloque con cuidado la punta de la uña sobre la uña natural, comenzando por el borde libre y presionando suavemente hacia abajo, asegurándose de que se integre perfectamente en el punto de contacto. Manténgala en su lugar durante unos segundos hasta que el pegamento se seque y la punta esté fija.
- Recortar y dar forma a las puntas: Una vez aplicadas todas las puntas, use un cortaúñas para recortarlas al largo deseado. Luego, use una lima para darles la forma deseada, integrándolas perfectamente con la uña natural.
- Pula la superficie: pula suavemente la superficie de la punta de la uña con un pulidor de grano fino para eliminar el brillo y crear una superficie ligeramente texturizada para una mejor adhesión del gel constructor.
- Aplicar la prebase: Aplique una capa fina y uniforme de prebase tanto en la uña natural como en la punta. Deje secar al aire.
- Aplicar una capa deslizante (opcional): Algunos técnicos de uñas prefieren aplicar una fina capa deslizante de gel constructor sobre la uña natural y la zona de unión con la punta para una mayor adherencia. Curar si se desea realizar este paso.
- Aplica el gel constructor: Toma una gota de gel constructor con el pincel y colócala en la unión entre la uña natural y la punta. Difumina con cuidado el gel constructor sobre ambas superficies, procurando una transición suave y sin líneas visibles entre la uña natural y la punta.
- Construye la extensión: Aplica gotas adicionales de gel constructor al resto de la uña, extendiéndolas sobre la punta para lograr el grosor, la forma y el ápice deseados. Recuerda trabajar con capas finas y secar entre capas si es necesario para evitar que el gel inunde las cutículas.
- Cura completamente: una vez que estés satisfecho con la forma y el grosor de tus extensiones, cúralas completamente bajo tu lámpara UV o LED de acuerdo con las instrucciones del fabricante del gel constructor.
- Limpie la capa de inhibición: después del curado, limpie las uñas con limpiador de uñas o alcohol isopropílico para eliminar la capa de inhibición pegajosa.
- Lima y da forma: Usa la lima de uñas para refinar la forma de tus extensiones, asegurándote de que queden uniformes y lisas. Presta especial atención a los lados y al borde libre. También puedes usar un pulidor para suavizar cualquier imperfección.
- Aplica el esmalte en gel y la capa superior: Aplica el color de esmalte en gel que prefieras y seca cada capa. Termina con una capa de capa superior en gel para dar brillo y protección, y seca también.
- Limpia y aplica aceite para cutículas: Limpia tus uñas una última vez y aplica aceite para cutículas para hidratarlas.

Uso de moldes de uñas para extensiones esculpidas:
- Siga los pasos de preparación: Asegúrese de que sus uñas naturales estén adecuadamente preparadas.
- Colocación de las formas de uñas: Fije con cuidado las formas de uñas a cada dedo, colocándolas cómodamente debajo del borde libre de la uña natural. La forma debe quedar perfectamente alineada para servir de guía al construir la extensión. Asegúrese de que cada forma esté correctamente colocada para lograr la forma y el largo de uña deseados.
- Aplicar primer: Aplique una capa fina de primer para uñas sobre sus uñas naturales, evitando la piel.
- Aplica una capa deslizante: Toma una pequeña cantidad de gel constructor y aplica una fina capa deslizante sobre la uña natural y ligeramente sobre la forma donde comenzarás a esculpir la extensión. Cura esta capa.
- Esculpe la extensión: Toma una gota de gel constructor y colócala en el borde libre de tu uña natural, donde se une con la forma. Con el pincel de gel constructor, esculpe con cuidado el gel para crear la longitud y forma deseadas para la extensión directamente sobre la forma. Trabaja en capas finas, dejando curar entre cada capa para fortalecer y evitar que el gel se corra. Asegúrate de crear un ápice adecuado para garantizar la integridad estructural.
- Cura completamente: Una vez que hayas esculpido la longitud y la forma deseadas en cada uña, cúralas completamente bajo la lámpara UV o LED. Es posible que tengas que secarlas más tiempo o incluso voltear la mano para asegurarte de que la parte inferior de la extensión esté bien curada.
- Retire con cuidado los moldes: una vez que el gel constructor esté completamente curado, retire con cuidado los moldes de las uñas de debajo de las extensiones.
- Limpie la capa de inhibición: limpie las extensiones esculpidas con limpiador de uñas o alcohol isopropílico para eliminar la capa de inhibición pegajosa.
- Lima y forma: Usa la lima de uñas para refinar la forma de las extensiones esculpidas. Aquí podrás perfeccionar el largo, los bordes y el borde libre. Usa un pulidor para alisar la superficie.
- Aplica el esmalte en gel y la capa superior: Aplica el color de esmalte en gel que hayas elegido y sécalo. Termina con una capa de capa superior para dar brillo y protección, y sécalo también.
- Limpia y aplica aceite para cutículas: limpia tus uñas una última vez y aplica aceite para cutículas en tus cutículas y la piel circundante.

Consejos importantes al utilizar gel constructor
Para garantizar que obtengas los mejores resultados posibles con el gel constructor, ten en cuenta estos consejos importantes:
- Comienza con capas finas: Siempre es mejor aplicar el gel constructor en capas finas y uniformes, y aplicarlo gradualmente. Esto ayuda a asegurar un curado adecuado y evita que el gel inunde las cutículas.
- Trabaja una uña a la vez: Especialmente al empezar, concéntrate en terminar una uña antes de pasar a la siguiente. Esto te dará más control sobre el proceso de aplicación.
- Utilice un pincel de buena calidad: un pincel de gel constructor de alta calidad hará una diferencia significativa en la facilidad y precisión de su aplicación.
- Limpie su pincel con frecuencia: limpie su pincel con una toallita sin pelusa humedecida en limpiador o alcohol durante la aplicación para evitar que el gel constructor se endurezca en las cerdas.
- No sobrecargues la brocha: toma solo la cantidad de producto necesaria para trabajar. Demasiado gel puede ser difícil de controlar y provocar derrames.
- La práctica hace al maestro: No te desanimes si tus primeros intentos no son perfectos. Como cualquier habilidad, usar el gel constructor eficazmente requiere práctica. Ten paciencia y sigue practicando.
- Siga las instrucciones del producto: Lea siempre y siga atentamente las instrucciones específicas proporcionadas con su producto de gel constructor y su lámpara UV/LED , ya que los tiempos de curado y las recomendaciones de aplicación pueden variar entre marcas.
- Evite el contacto con la piel: Tenga cuidado de no tocar la piel con el gel constructor, ya que puede causar irritación o reacciones alérgicas. Si el gel entra en contacto con la piel, límpiela inmediatamente con un limpiador o una toallita empapada en alcohol antes de que se endurezca.

Preguntas frecuentes sobre el uso del gel constructor
¿Cuánto debes limar tus uñas antes de usar el gel constructor?
Debes pulir suavemente tus uñas naturales lo suficiente para eliminar su brillo natural. Usa una lima pulidora de grano fino (180-240) para raspar ligeramente la superficie; esto ayuda a que el gel constructor se adhiera mejor.
Consejo importante: No limes demasiado ni afines las uñas. El objetivo es crear una textura ligera, no debilitar la placa ungueal natural.
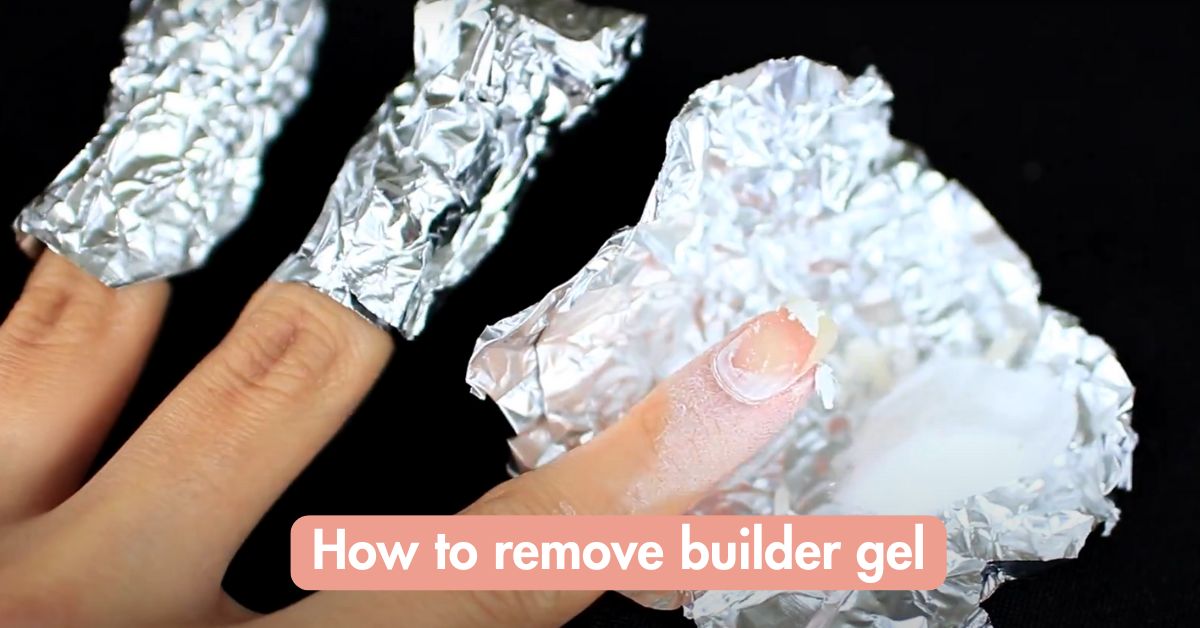
¿Cómo quitar el gel constructor?
El método de eliminación depende de si estás usando gel duro o gel suave (soak-off):
- El gel constructor suave se puede retirar con acetona, de forma similar a como se retira el esmalte en gel normal. El gel constructor duro debe limarse con una lima eléctrica o manual.
- Utiliza las técnicas de extracción adecuadas para proteger tus uñas naturales. Si no estás seguro o no tienes experiencia, lo mejor es acudir a un manicurista profesional.
¿Cuánto tiempo se debe secar el gel constructor bajo una lámpara UV?
El tiempo de curado del gel constructor bajo una lámpara UV puede variar según el producto específico y la potencia de la lámpara. Normalmente, las capas más gruesas de gel constructor requieren de 2 a 3 minutos de curado bajo una lámpara UV.
Consejo profesional: Siga siempre las instrucciones del fabricante para garantizar que el gel se cure correctamente y alcance su máxima resistencia y durabilidad. Un curado insuficiente puede provocar que se levante, mientras que un curado excesivo puede volverlo quebradizo y propenso a agrietarse.
Esperamos que esta guía te ayude a sentirte segura usando el gel constructor para lograr uñas hermosas y duraderas en casa. ¡No olvides explorar los geles constructores y herramientas de alta calidad de SL Beauty para mejorar tu rutina de cuidado de uñas!
Dejar un comentario
Este sitio está protegido por hCaptcha y se aplican la Política de privacidad de hCaptcha y los Términos del servicio.