Gel Nails at Home: A Simple DIY Guide for Beginners
Looking to do gel nails at home to avoid a trip to the nail salon?
Doing gel nails at home isn’t so different from the nail salons. So long as you have the right equipment and have the patience to learn, you’re going to find this to be rather enjoyable to do.
Will it work? Yes, perfectly… but only if you know how to do it right!
In this guide, you’ll learn:
- Is it Worth Doing Gel Nails at Home?
- What Do You Need for Gel Nails at Home?
- How to Do Your Own Gel Nails At Home: 8 Easy Steps
- How to Remove Gel Nail Polish at Home
- Safety Precautions
Is it Worth Doing Gel Nails at Home?

The biggest reason to do your own gel nails at home is to save significant money. A gel manicure can cost $50 - $70 at a nail salon every visit, which is $600 - $840 a year if you visit a nail salon monthly. Whereas an at-home gel manicure kit can cost $79 and allow you to repeatedly do your own nails at no extra costs.
- It’s cost-effective. When doing gel nails at home, you only need to worry about the cost of buying products and equipment rather than the additional service cost.
- It’s time-saving. At-home gel manicures don't require you to have to travel to the salon, saving you time spent on commuting.
- You get to be creative. Coming up with unique gel nail polish styles allows you to experiment with color and design ideas to develop personalized nail art you’ve always wanted to try.
- It’s resourceful. Typically, a gel nail polish bottle can last you 20-30 manicures. Our S&L gel nail polishes contains more volume than the average gel polish bottle. They last really long.
- It's healthier. Nail salons rush to remove the gel nail polish on your nails without adequate time for them to soak. If you DIY at home, you can soak the gel polish off more patiently so your nails won't damage.
What You Need for Gel Nails at Home
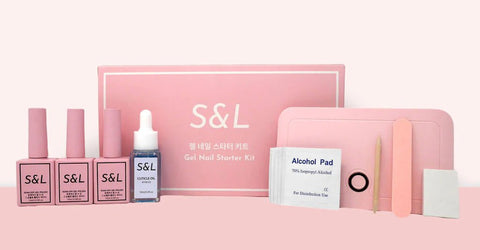
Getting gel nails done is unlike a traditional nail polish procedure where equipment is not needed. With gel nails, you need an at-home gel nail polish kit in order to properly apply and remove gel polish.
What you need for a seamless at-home gel mani is:
- LED lamp or UV Lamp
- Nail file
- Nail buffer
- Cuticle oil
- Orange wood sticks or stainless steel cuticle pushers
- Rubbing alcohol
- Cotton pads
- UV gloves
- Gel base coat
- Gel top coat
- Gel polish colors
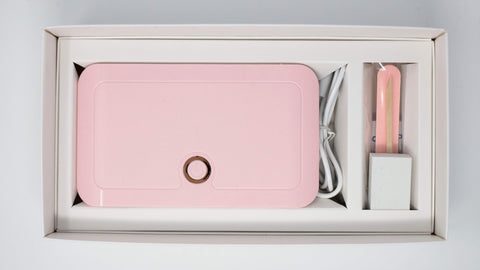
1) LED or UV Cure Lamp

Without a curing lamp that emits UV light, you won’t be able to cure your gel nails.
A UV lamp or LED curing lamp is the only right choice here. However, our recommendation is to stick with an LED curing lamp as it omits less UV light and dries the gel polish the quickest.
2) Nail file

(Source: Pexels)
There are two main types of nail files: emery boards and glass files. Either or works. You need a nail file for your at-home gel manicures because they're essential for shaping and prepping your nails.
We recommend glass or crystal as they last longer because the file pattern etched into the glass or crystal, hence the longevity. Good to note — cheap glass files have patterns that are glued to the surface rather than etched on and so they wear off quickly.
Make sure you clean them after a while to keep them safe for use.
3) Nail buffer

Nail buffing is crucial in your home manicure because it smooths and evens out your nail surface. Most times, your nails' surface isn't smooth enough to go without one, and so the purpose of a nail buffer is to prepare your nails to adhere to the gel polish not only properly, but longer as well.
To achieve perfect buffing, you need a nail buffer made of fine grit.
4) Rubbing alcohol

Rubbing alcohol does two things in a gel manicure: it cleans your nail bed and removes the gel polish.
While anything 70% or higher can work well, using rubbing alcohol with 91% alcohol content is best for this work.
Water alone isn't as effective at removing oils and debris from your nails as rubbing alcohol is. Rubbing alcohol helps to dehydrate the nail surface, which allows the gel polish to stick better and last longer without chipping or peeling.
It's also used to break down gel polish, making it easier to remove.
5) Cotton pads
You need cotton pads for a gel manicure to apply rubbing alcohol on for cleaning your nails before your gel manicure and and removing your gel nails later.
You'll want lint-free cotton pads because they prevent stray fibers from getting stuck in the gel polish. If these fibers are left on your nails, they can potentially lift your gel nails.
6) UV gloves

If you plan on doing frequent manicures, UV gloves can help to limit the amount of UV rays your hand will exposed to by the curing lamps during a gel manicure.
Make sure the UV gloves are reusable.
7) Gel base coat

A gel base coat sets the foundation for your gel nail application process.
This first layer helps your gel polish stick better to your nail plate, so your gel manicure stays strong and become chip-resistant. You can't do a gel manicure without applying a gel base coat.
You can use any brands for a gel base coat and gel top coat as long as they are specifically for gel nail polishes. However, we recommend using S&L gel base and top coats for the best results.
8) Gel Top Coat

A gel top coat protects your gel polish layer by forming a hard, protective coating over it. This shield helps prevent chips and scratches, keeping your nails looking freshly done for longer.
Without a gel top coat applied, your gel polish is exposed to everyday elements that could quickly chip or degrade your manicure, like sunlight and water.
The gel top coat is the last layer you apply during the gel manicure process. Its protective features also create the highly radiant and glossy appearance.
Like the gel base coat, a gel top coat is necessary for doing gel nails.
9) Gel Polish

(Source: S&L)
Finally, the gel nail polish. Choose a brand that has a long-lasting formula and has many color options. For DIY gel nails at home, you want complimentary color options to work with as well as non-toxic ingredients because you’ll be experimenting with them often.
All the colors in any of our gift sets compliment each other to give you endless color combinations to be creative as you experiment at home.
But don’t limit yourself. See our entire collection of 100+ gel nail polish colors and pick out the ones that you like. The ingredients used to make our polishes are vegan-friendly, sulfates free, cruelty-free, and paraben-free.
10) Cuticle Oil

You need to moisturize your nails and surrounding skin after applying your gel manicure at home to keep them healthy. The best solution for this job is cuticle oil.
Compared to lotion, which typically targets the skin's surface, cuticle oil is specially made to deeply hydrate and nourish the nails and cuticles by getting into the nail's porous surface better.
Cuticle oil can also make nails stronger and more flexible, lowering the chance of them breaking and helping them grow healthier.
How to Do Your Own Gel Nails At Home: 8 Easy Steps
Now that you know what you need for a gel manicure at home, here is an easy-to-follow, step-by-step guide on how to do your own gel nails at home.
1. Prep Your Nails

Prepping your nails before the whole gel application is crucial because it's not something you can do after applying the gel polish. If you were to try, you would immediately ruin your gel manicure.
Prep your nails by:
- Cutting your nails - Use a nail cutter to cut off extra-long extensions of your nails for a uniform look.
- Shaping your Nails - Shaping your nails requires nothing but a nail file. File your nails to a shape you desire, whether it's round, pointed, square, almond, or oval - it's your preference.
2. Push Your Cuticles Back
(S&L's Gel Nail Starter Kit comes with a cuticle pusher)
Push your cuticles back gently with a cuticle pusher enough to reveal the base of your nails. Small orange wooden sticks and metal cuticle pushers are used here. This would allow your nail bed to be more exposed to gel polish.
Remove any debris on your nails after you push back your cuticles, as the debris can cause your gel nails to lift later in these steps.
Any oil or residue you leave behind too can lead to your gel nail lifting.
3. Buff Your Nails

A buffer has three sides that are crucial in the buffing process: a rough, smooth, and shiner side.
The smoothness of your nail matters when it comes to making your gel manicure last longer. When your nails are smooth, the gel can bond evenly, reducing the likelihood of chipping or peeling.
Use the roughest part of the buffer to gently buff the surface of your nail as you move the buffer from your nail base to the edges. Depending on the buffer’s abrasiveness, don’t overdo it as you can easily thin your nails.
Continue buffing until your nail bed no longer shows any unevenness or blemishes. If your nails are already even, this step can be skipped.
Use the buffer's smooth and shiner sides to achieve a smooth finish.
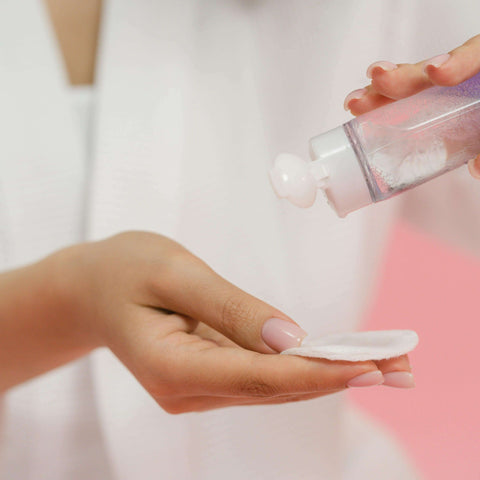
4. Wipe Your Nails with Rubbing Alcohol

The debris left behind from pushing your cuticles and buffing leaves can lift your gel nails later on. So you need to use rubbing alcohol to clear your nail bed of traces of debris.
Applying the rubbing alcohol is easy but should be thorough. After washing your hand with warm water and hand soap, dry them gently using a soft cloth.
Then put the alcohol on a cotton pad and wipe each finger nail gently. Make sure no strands of cotton get attached to the nail bed. If they do, simply remove them.
Alcohol dries naturally fast, so you don’t have to wait long for each finger nail to dry. Redo the same process for the other fingers to achieve dry and clean nails free from oils ready for base coating.
5. Apply Gel Base Coat

(Source: S&L)
You can’t skip this crucial step of applying a gel base coat. Without a gel base coat, your gel nail simply won’t adhere to your nail bed.
Apply a thin layer of base coat. Make sure it’s evenly applied across the whole nail. Otherwise, when you apply the gel polish, there will be a gap where the gel polish won’t adhere.
After applying the gel base coat, cure the nail with your UV/LED lamp for about 45 to 60 seconds. This duration differs depending on the lamp you're using.
The gel base coat is supposed to be sticky after curing. It's a misconception to believe the base coat is supposed to feel dry after curing.
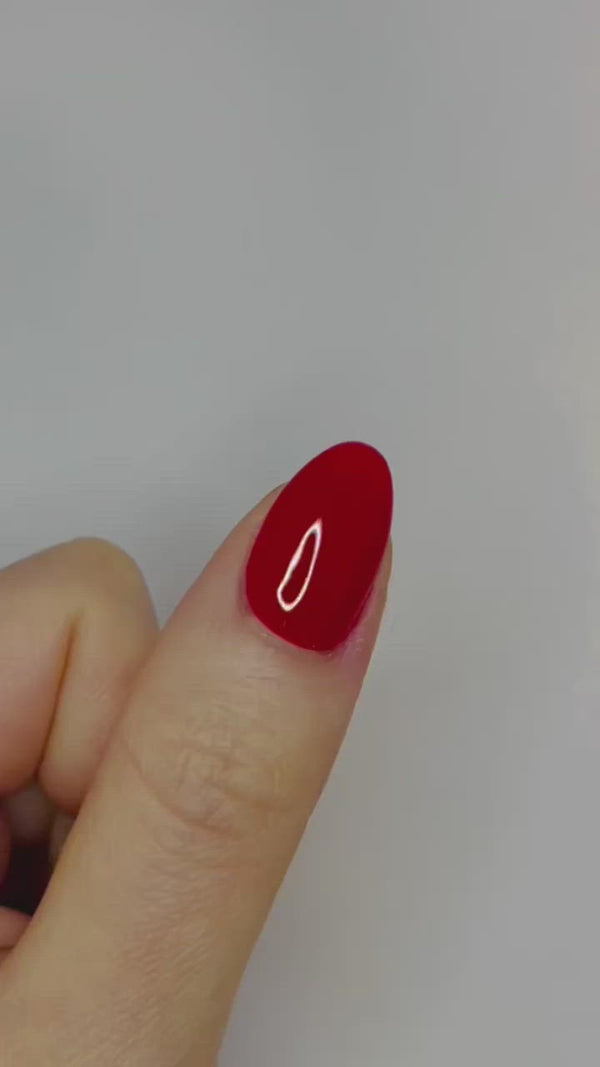
6. Apply Gel Polish

(Source: S&L)
After your gel base coat is cured, it’s time to do the fun part: apply your gel polish.
Here's how to use gel polish: apply a thin layer of gel polish carefully without the gel polish mistakenly touching your cuticles. Make sure you evenly apply the gel polish on all of your finger nails.
Sometimes, manicurists paint the entire hand before curing it under a lamp. Sometimes, manicurists paint and cure them individually. Either approach is fine, it’s up to you.
Regardless of when you choose to cure your nails, you should cure your nail based on the amount of time specified by your curing lamp. If none is indicated, 30 to 60 seconds is the typical amount of time.
7. Apply Gel Top Coat
After curing the gel polish, apply a thin layer of the gel top coat to your nails and make sure to carefully seal the tips. This helps protect your manicure and ensures the edges are covered to prevent chipping and lifting at the tips.
After that, smooth over the layer and cure it once more for 30 to 60 seconds, depending on your UV/LED lamp's settings.
8. Apply cuticle oil

(Source: Pexels)
Massage cuticle oil around your nails and cuticles to help nourish your skin and cuticles to prevent them from drying out and keeping them looking healthy.
Remember, when you have a gel manicure, hot water isn't your best friend as it lifts gel polish faster. Avoid it if possible.
How to Remove Gel Nail Polish at Home
Removing your own gel nail polish at home can save you money and time. There are two ways to go about it: use a gel nail polish remover or the traditional way of using acetone.
Using a gel polish remover is significantly faster and requires fewer supplies. But to remove gel polish with acetone requires the following supplies:
- Acetone (pure, not regular nail polish remover)
- Cotton balls or pads
- Aluminum foil
- Nail file
- Orange stick or cuticle pusher
- Nail buffer
- Cuticle oil
Here's how to do it the same way the manicurists do at professional nail salons.
Using a Gel Nail Polish Remover


With a gel polish remover, no acetone, cotton balls or aluminum foil needed.
This is one of the fastest and easiest way to remove gel nails because you simply buff off the top coat, apply the gel polish remover, and wait 3-5 minutes for the gel color to lift.
You can find the gel polish remover in our gel nail kit. Our starter kit lets you start applying gel nails and removing gel nails all in one kit.
Using Acetone

(Source: Pexels)
Due to the high-solvent nature of acetone, it remains as one of the best nail polish removers. However, using acetone frequently removes lots of natural oils and pales your skin because you need to soak your nails in acetone for 15-20 minutes.
You have to settle for one of the two options to use it: file your nails and soak them in acetone, or soak cotton in acetone, and wrap your nails with cotton and foils.
Step 1: Filing
Gently file the surface of your gel polish using a nail file. Scratch enough to remove the gloss and break the seal, but avoid filing too deep to prevent damage to your natural nail.
Step 2: Soaking
Soak a cotton pad in acetone and place it on your nail. Wrap your fingertip in aluminum foil to secure the cotton ball. Ensure it's snug but not too tight.
Step 3: Wait 15-20 Minutes
Leave the acetone-soaked cotton balls on your nails for about 15-20 minutes. The timing can vary depending on the number of layers you've applied.
Step 4: Removing
Remove the aluminum foil and cotton balls. Use an orange stick or a cuticle pusher to gently push the gel polish off your nails. If the gel polish does not come off easily, re-soak your nails for a few more minutes.
Step 5: Buffing
Use a nail buffer to smooth out the surface of your nails, removing any residual polish.
Step 6: Moisturizing
After all the polish is removed and your nails are clean, apply cuticle oil or a moisturizer to nourish your nails and cuticles.
Safety Precautions handling and applying gel nails at home
-
Always work in a well-ventilated area: Gel nail polish give off fumes that can be harmful if inhaled. Minimize your exposure by working in a well-ventilated space, such as an open window or a room with a fan.
-
Wear UV gloves: Since your nail lamp will emit UV rays, it's a good idea to wear UV gel manicure gloves when you're curing your nails. This will help prevent unnecessary exposure of your skin to UV light to your skin.
-
Avoid contact with eyes: Avoid getting it in your eyes since it can cause irritation. If you do, rinse your eyes immediately with plenty of water.
-
Keep the equipment clean: Clean your tools and equipment (nail clippers, cuticle pushers, nail files especially) with rubbing alcohol or soap to prevent the spread of bacteria.
-
Don't over-file your nails: Over-filing your nails can damage them and make them more susceptible to infection. Use a gentle touch when filing your nails, and don't file them too often.
-
Follow the manufacturer's instructions: Each gel polish brand and UV/LED lamp has its own set of instructions, so make sure you read and follow them carefully. This will help you to achieve the best results and avoid any safety issues.
-
Use a high-quality gel polish: Choose a reputable brand of gel polish like S&L that is known for its quality and safety. Cheap or low-quality polishes may contain harmful chemicals or be prone to chipping and peeling.
Takeaways
DIY gel nails at home is a matter of preparation. Make sure you have all the necessary supplies before you begin.
Each step we mentioned is crucial, so you should follow all the steps without skipping any of them. We have a complete gel manicure kit that lets you both apply and remove gel nails at home and is highly favored by beginners.
9 comments
I love the thorough explanation and it has really prepared me because l’m thinking of becoming a nail Tech
How much does your starter kit cost ?
I really love the explanation of the process
Thx
Thank you I’ll try it . It looks simple enough.
How much for a starter kit please?
How much is the starter kit I will love to have one?
Excellent detail. I will purchase the tools mention..thanks
Hoping you guys will have a starter kit. I’ve been looking for one
Thank you for the straight forward and easy understanding to have the best at home gel nails.